ESP32 survival guide
- Working with ESP32 WROVER (camera enabled)
- creating graphics for monochrome lcd displays
- Remotely control an esp32 with a built-in web server and clourflare
- Pong Game - Introduction to ESP32
Working with ESP32 WROVER (camera enabled)
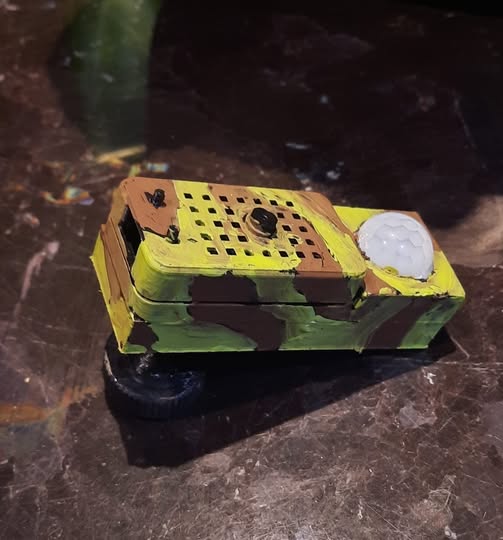 |
I decided to try an alternative to ESP32 cam boards which are limited in functionality due to all pins except 13 being reserved for the camera. The ESP2 WROVER boards, although less popular, offers certain advantages:
disadvantages:
|
It took some time to solve a couple of issues I ran into. At first I assumed I had received bad hardware, but it turned out the setting in my Arduino IDE were simply wrong. Also I had the wrong camera type selected.
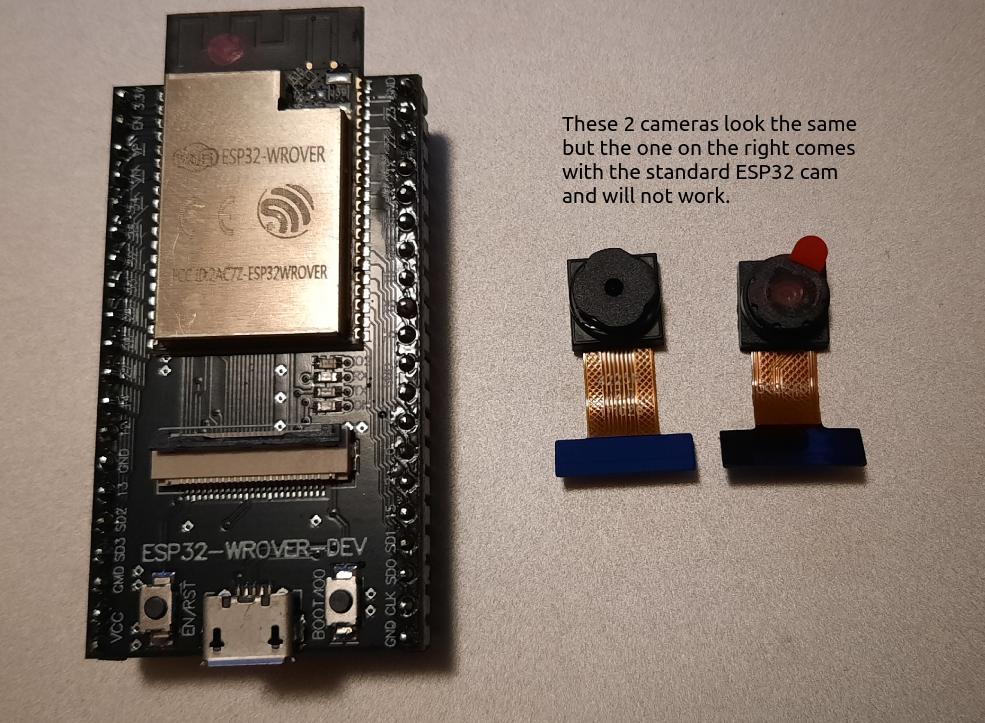
First of all, the cameras that ship with ESP32 Wrover boards are NOT the same ones we get with ESP32 cam boards. Although both are technically OV2640 cameras, I was not able to get those shipped with ESP32 cameras to work with my ESP32 WROOM.
In my code I had to switch from:
#define CAMERA_MODEL_AI_THINKERto:
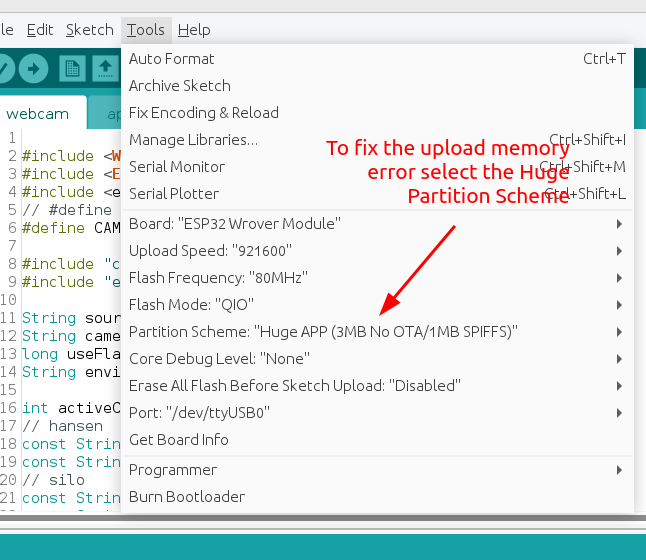
#define CAMERA_MODEL_WROVER_KIT // Has PSRAMAdditionally, when uploading using the ESP32 WROVER Module, I was getting this error:
esp32 Sketch uses 1509765 bytes (115%) of program storage space. Maximum is 1310720 bytes.
This was fixed by setting the Partition Scheme in the arduino IDE to "huge" (see screen below)
With these changes I was able to get the ESP32 WROVER and camera to work propery.
See also: https://randomnerdtutorials.com/getting-started-freenove-esp32-wrover-cam/
creating graphics for monochrome lcd displays
See: https://homelab.impressto.ca/image2hex.php
Remotely control an esp32 with a built-in web server and clourflare
cloudflared tunnel  create tunnel-name
cloudflared tunnel route dns tunnel-name tunnel.example.com
cloudflared tunnel run --url http://localhost:5467  tunnel-name
Update /etc/cloudflared/config.yml and add an entry:
- hostname: leds.impressto.ca
service: http://192.168.0.192:80
Pong Game - Introduction to ESP32
A fun pong game for the TTGO T-Display with sound effects. Choose your sound module:
- DFPlayer Mini — full MP3 playback from SD card, one track per event
- ISD1820 — simple record-and-play chip, one recorded sound triggered on paddle hit or score lost

The board

What You'll Learn
- How to upload code to an ESP32
- How to wire a sound module (DFPlayer Mini or ISD1820) and trigger it from code
- How software controls hardware through GPIO pins
- Serial communication between devices (DFPlayer)
- How edge-triggered signals work (ISD1820)
What You Need
Hardware
- TTGO T-Display (ESP32 with built-in screen)
- USB-C cable to connect to your computer
- Small speaker (3W 8ohm recommended)
- Jumper wires to connect things
Choose one sound module:
| Module | Pros | Cons |
|---|---|---|
| DFPlayer Mini | Different sound per event, SD card holds many tracks | Needs SD card and MP3 files |
| ISD1820 | No SD card needed, record your own voice/sound | Only one sound, no volume control |
Software
- VS Code with PlatformIO extension
- Start your project with the demo code - https://github.com/impressto/tdisplay-pong
How to Play
Onboard Buttons
External Buttons (Optional)
You can add your own buttons for a better gaming experience!
- GPIO 25 - External button to move paddle LEFT
- GPIO 13 - External button to move paddle RIGHT
Wiring external buttons:
Button leg 1 -----> GPIO pin (25 or 13)
Button leg 2 -----> GND
No resistor needed - the ESP32 has internal pull-up resistors!
Gameplay
- Hit the ball with your paddle to score points!
- The ball appears to roll as it moves - watch it spin!
- If you miss, you lose a point
Getting Started
Step 1: Upload the Code
- Connect your T-Display to your computer with a USB cable
- Open this folder in VS Code
- Click the PlatformIO: Upload button (→ arrow at the bottom)
- Wait for it to finish - the game will start automatically!
Step 2: Play the Game First!
Before wiring anything, play the game to understand when events happen:
- Ball bounces off walls
- Ball hits your paddle
- You score a point
- You miss the ball
Wiring Up Sound!
Pick one sound module and follow its wiring guide below. Then set the matching option in config.h.
Option A: DFPlayer Mini
The DFPlayer Mini plays MP3 files from a micro SD card. You can assign a different sound to each game event.
Wiring
T-Display          DFPlayer Mini
---------          -------------
GPIO 17 (TX) ----> RX  (through 1K resistor recommended)
GPIO 21 (RX) <---- TX
GPIO 22      <---- BUSY  (optional — detects when playing)
GND          ----> GND
5V           ----> VCC
                   SPK1 ----> Speaker (+)
                   SPK2 ----> Speaker (-)
Note: Use 5V for louder output. The 1K resistor on TX protects the DFPlayer's RX pin.
Setting Up Sound Files
- Format a micro SD card as FAT32
- Create a folder named
mp3in the root - Name your sound files:
0001.mp3,0002.mp3,0003.mp3, etc. - Insert the SD card into the DFPlayer
Recommended sound files:
| File | Event |
|---|---|
0001.mp3 |
Score milestone award (every 5 points by default) |
0002.mp3 |
Paddle hit (regular) |
0003.mp3 |
Score lost |
Enable in config.h
#define DFPLAYER_ENABLED   1    // Enable DFPlayer
#define ISD1820_ENABLED    0    // Disable ISD1820
Option B: ISD1820 Voice Record Playback Module
The ISD1820 is the simplest way to add sound. It stores one recorded sound directly on the chip — no SD card, no MP3 files. Just record your voice or a sound effect by holding the REC button, and the ESP32 will trigger it during the game.
Recording Your Sound
- Power the ISD1820 (3.3V or 5V)
- Hold the REC button on the module and speak or make a sound into the microphone
- Release REC when done — the sound is saved permanently, even without power
- Press the PLAY button on the module to hear it back before wiring to the ESP32
Wiring
T-Display          ISD1820
---------          -------
GPIO 15      ----> P-E  (Play Edge-triggered)
GND          ----> GND
3.3V or 5V   ----> VCC
                   SP+  ----> Speaker (+)
                   SP-  ----> Speaker (-)
Important: Connect to the P-E pin (Play Edge), NOT the P-L pin. P-E plays the sound once when the pin goes HIGH, which is what we want.
Enable in config.h
#define DFPLAYER_ENABLED            0    // Disable DFPlayer
#define ISD1820_ENABLED             1    // Enable ISD1820
#define ISD1820_TRIGGER_PADDLE_HIT  1    // Play on paddle hit (1=yes, 0=no)
#define ISD1820_TRIGGER_SCORE_LOST  1    // Play on score lost (1=yes, 0=no)
No Sound Module?
That's fine too — just disable both in config.h:
#define DFPLAYER_ENABLED   0
#define ISD1820_ENABLED    0
The game runs perfectly without any sound hardware attached.
Game Events
| Event | When Does It Trigger? | DFPlayer | ISD1820 |
|---|---|---|---|
| Wall Bounce | Ball bounces off any wall | ❌ | ❌ |
| Paddle Hit | Ball hits your paddle | ✅ regular sound | ✅ (configurable) |
| Score Milestone | Score reaches a multiple of 5 | ✅ award sound | ❌ |
| Score Lost | You miss the ball | ✅ | ✅ (configurable) |
Customizing the Game
Open src/config.h to change settings:
// ---- DFPlayer ----
#define DFPLAYER_ENABLED   1     // 1 = enable, 0 = disable
#define DFPLAYER_TX_PIN    17
#define DFPLAYER_RX_PIN    21
#define DFPLAYER_VOLUME    10    // 0-30
#define TRACK_AWARD        1     // 0001.mp3 - plays at score milestones
#define TRACK_PADDLE_HIT   2     // 0002.mp3 - plays on regular paddle hit
#define TRACK_SCORE_LOST   3     // 0003.mp3 - plays on score lost
#define SCORE_MILESTONE_INTERVAL  5   // Award sound fires at 5, 10, 15, 20...

// ---- ISD1820 ----
#define ISD1820_ENABLED             0    // 1 = enable, 0 = disable
#define ISD1820_PLAY_PIN            15   // GPIO connected to P-E pin
#define ISD1820_TRIGGER_PADDLE_HIT  1    // 1 = trigger on paddle hit
#define ISD1820_TRIGGER_SCORE_LOST  1    // 1 = trigger on score lost
Other Fun Settings to Try
#define PADDLE_WIDTH     15    // Make paddle bigger = easier game
#define BALL_SPEED_START  3    // Higher number = slower ball
#define PADDLE_SPEED      2    // How fast paddle moves

// External button pins (set to -1 to disable)
#define EXT_BUTTON_DOWN  25    // External button - paddle left
#define EXT_BUTTON_UP    13    // External button - paddle right
Adding Your Own Event Code!
Want to customize what happens when game events occur? You can add your own custom code!
Where to Put Your Code
Open src/events.cpp - this is where all the event magic happens!
The file has 4 event functions you can modify:
void onWallBounce() {
  // This runs when the ball hits a wall
}

void onPaddleHit() {
  // This runs when you hit the ball
}

void onScoreGained() {
  // This runs when you score a point
}

void onScoreLost() {
  // This runs when you miss the ball
}
Project Files Overview
| File | What's Inside |
|---|---|
src/main.cpp |
The game code (paddle, ball, score) |
src/config.h |
Settings you can change (pins, speeds, sizes) |
src/events.h |
List of event functions (don't change this) |
src/events.cpp |
Your code goes here! Event implementations |
T-Display Pinout
Here are the GPIO pins used in this project:
| Pin | Usage | Notes |
|---|---|---|
| 0 | Left button | Onboard button |
| 13 | External button | Default: External LEFT button |
| 15 | ISD1820 P-E | Trigger pin (when ISD1820 enabled) |
| 17 | DFPlayer TX | Serial TX to DFPlayer RX (when DFPlayer enabled) |
| 21 | DFPlayer RX | Serial RX from DFPlayer TX (when DFPlayer enabled) |
| 22 | DFPlayer BUSY | Optional: detect when DFPlayer is playing |
| 25 | External button | Default: External RIGHT button |
| 26 | Event pin | Ball wall bounce |
| 27 | Event pin | Ball paddle hit |
| 32 | Event pin | Score gained |
| 33 | Event pin | Score lost |
| 35 | Right button | Onboard button (input only) |
Troubleshooting
No sound from DFPlayer
- Check wiring: TX to RX, RX to TX (they cross over!)
- Make sure the SD card is formatted as FAT32
- Verify sound files are in an
mp3folder and named0001.mp3,0002.mp3, etc. - Try a different speaker
- Check the DFPlayer is getting power (5V recommended for reliable operation)
- Open the Serial Monitor — the game prints
[DFPlayer] OK!or a wiring error on startup
No sound from ISD1820
- Make sure you have recorded a sound first (hold REC button, speak, release)
- Check you are connected to the P-E pin, not P-L
- Test the sound by pressing the PLAY button on the module itself
- Check
ISD1820_ENABLED 1is set inconfig.h - Verify the GPIO pin number matches
ISD1820_PLAY_PINinconfig.h
Code won't upload
- Try pressing the RESET button on the T-Display
- Make sure the USB cable supports data (some only charge)
- Try a different USB port
Game runs but no sound
- Open the Serial Monitor — startup messages show which module is active and whether it initialised successfully
Want to Learn More?
- Change the ball to a different image! (Look at
kim-jong-un.h) - Add your own background image! (Look at
background.h) - Create new events for different game situations
- Adjust the ball rotation speed in
main.cpp(BALL_ROTATION_SPEED)
Features
- 🎨 Custom ball sprite with rolling animation
- 🖼️ Background image support
- 🎮 Onboard + external button control
- 🔊 DFPlayer Mini sound effects (multiple tracks, SD card)
- 🔊 ISD1820 voice module support (record your own sound, no SD card needed)
- 📈 Increasing difficulty as you score
Have fun learning electronics! 🚀